
Protect floors, label parts, unlock connectors, lift straight, bag hardware, wrap pieces.
If you want to know how to disassemble a sectional sofa without damage, you are in the right place. I have helped dozens of clients move, stage homes, and store sofas in tight spaces. This guide shares proven steps, photos-in-your-mind tips, and real mistakes I have seen. Follow along and you will handle each piece like a pro, even if this is your first time.
Tools, Prep, and Space Planning
Success starts with a clear plan and the right tools. When people ask how to disassemble a sectional sofa without damage, the answer often begins with setup, not strength.
Gather these tools and supplies:
- Socket wrench set, including deep sockets for hidden nuts
- Allen keys and a Phillips and flat screwdriver
- Needle-nose pliers for clips and staples
- Painter’s tape, a marker, and zip-top bags for labels and hardware
- Moving blankets, stretch wrap, and furniture pads to protect fabric and leather
- Work gloves and non-slip shoes for grip and safety
- A soft pry tool or plastic putty knife for tight joints
- Furniture sliders and a dolly for smooth moves
Prepare your space:
- Clear a path to the door. Remove rugs, stools, and side tables.
- Lay blankets or cardboard to protect floors.
- Take photos of the sofa from the front, back, and under each piece. These help when you reassemble.
Pro tip from the field: I label every seat module left to right as A, B, C, and so on. Doors and stairs then get the same code, so the path matches the order you will carry parts.
Source: bestbuy.com
Know Your Sectional: Connectors and Modules
Understanding the build is key to learning how to disassemble a sectional sofa without damage. Most sectionals join with simple but strong hardware. The trick is to unlock, not pry.
Common connector types:
- Hook-and-pin or alligator clips that drop in and lock with gravity
- C-shaped metal brackets that slide together and release with a lift
- Bolts or cam locks under the frame or inside the dust cover
- Slide rails or tongue-and-groove plates at the base
- Quick-release backs on recliners that click onto metal tracks
Look for these signs:
- A dust cover under each seat held by Velcro or staples
- Corner wedge units that sit lower than armless seats
- Power cords for recliners or USB ports that need unplugging before you lift
If you still have the manual, scan it now. Many brands show the connector style in a simple diagram. If not, a flashlight and a phone camera will do the job.
Source: bedbathandbeyond.com
Step-by-Step: How to Disassemble a Sectional Sofa Without Damage
Use this process to master how to disassemble a sectional sofa without damage. Move slow. Lift straight. Keep parts organized.
- Document the setup
- Take wide shots and close-ups of each joint.
- Note the left-hand and right-hand arms, chaise side, and recliner modules.
- Remove cushions and pillows
- Bag throw pillows to keep dust off.
- Zip and stack seat and back cushions by module.
- Unplug all power and remove wires
- Find transformers and release clips.
- Coil cords, label them, and bag them.
- Expose connectors
- Lift or open the dust cover under each seat.
- Use a flashlight to spot clips, bolts, or rails.
- Unlock the joints
- For clips: Lift the lighter module straight up to free the teeth.
- For rails: Slide forward or backward as the rail allows, then lift.
- Support the frame while lifting
- One person stabilizes the heavier piece.
- The other lifts the free piece straight up, not at an angle.
- Detach arms and backs if needed
- Some backs slide up to release from metal tracks.
- Arms may bolt from inside. Use the right socket and keep bolts together.
- Handle special seats
- Recliners often have a pull tab at the back base.
- Chaise units can bolt through the deck. Check before pulling.
- Bag and label hardware
- One bag per module. Label A hardware, B hardware, and so on.
- Tape each bag to the inside base of its module or place all in a single box.
- Wrap each part
- Cover corners with pads.
- Wrap leather or fabric with blankets, then stretch wrap to hold it.
- Move modules in order
- Carry with the frame facing in.
- Use sliders on wood floors and a dolly when going long distances.
- Load or store like Tetris
- Heavier bases on the bottom.
- Keep pressure off arms and cushion foam.
Field note: On older sofas, dried screws strip fast. Use the correct bit and apply steady pressure. If a screw head starts to cam out, stop and switch to a higher-grip bit.
Source: bestbuy.com
Protect Each Part: Wrapping, Labeling, and Hardware Control
Packing right is half the battle in how to disassemble a sectional sofa without damage. Good protection prevents dents, snags, and tears during a move.
Follow this simple system:
- Label every module with painter’s tape: A seat, B seat, Corner, Chaise, Left Arm, Right Arm.
- Place all bolts, nuts, and clips in separate bags. Write the module letter, the joint, and the tool size.
- Wrap each piece. Pads cover the corners first, then the whole piece. Add stretch wrap to lock pads in place.
Extra care for upholstery:
- For leather, use breathable pads. Avoid plastic touching leather for long storage.
- For fabric, wrap the base and arms. Keep moisture away.
- Never tape directly on fabric or leather. Tape only to the wrap or pads.
Personal tip: I snap a photo of every hardware bag next to its module label. When you unpack, you can match the photo and save time.

Source: bedbathandbeyond.com
Special Cases: Chaise, Recliners, Sleepers, and Power Units
Every sofa is a bit different, so these notes will help you master how to disassemble a sectional sofa without damage across models.
Chaise lounges:
- Look for bolts under the deck joining the chaise to the neighbor seat.
- Remove the cushion and fish for bolts through the dust cover.
Reclining modules:
- Most recliner backs lift straight up off metal tracks after you pull two small release levers.
- Lock the footrest closed with a strap so it does not pop open mid-move.
Sleeper sofas:
- Open the bed. Remove the mattress first if the design allows.
- Strap the folded frame shut before moving the base.
Power units:
- Unplug at the wall and at each transformer.
- Label every cable pair so you do not cross power and control leads later.
Corner wedges:
- These often have two or three clip points.
- Lift straight up. Do not pry from the front edge.
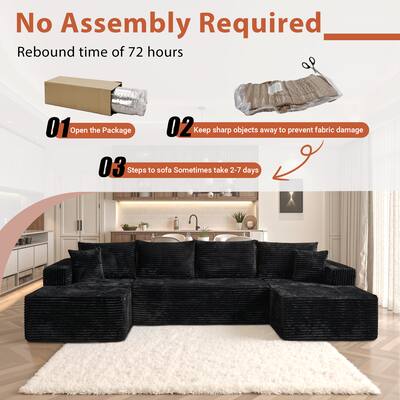
Source: bestbuy.com
Common Mistakes to Avoid and Pro Tips
If you want to learn how to disassemble a sectional sofa without damage, avoid these traps I see again and again.
Mistakes to avoid:
- Pulling pieces apart at an angle and bending clips
- Skipping photos before you start and guessing later
- Using tape on leather or fabric
- Mixing hardware from different modules
- Forgetting to unplug power seats before lifting
Pro tips that save time:
- Color code labels. Blue for left side modules, green for right side.
- Keep a small magnet to grab dropped screws.
- Use a headlamp to free both hands and keep light on the joint.
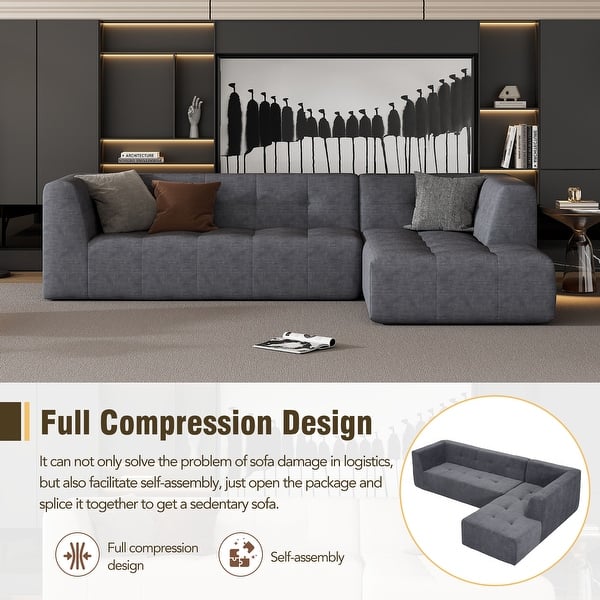
Source: bedbathandbeyond.com
Storage, Transport, and Smooth Reassembly
Your plan for after the teardown matters as much as how to disassemble a sectional sofa without damage. Good stacking and dry storage keep frames straight and fabric fresh.
Transport tips:
- Load heavy bases first against the truck wall.
- Keep arms and backs on top to avoid pressure dents.
- Use straps over blankets, not bare fabric or leather.
Storage best practices:
- Store upright on feet when you can.
- Keep items off damp floors with pallets.
- Allow airflow. Avoid shrink-wrapping for long-term leather storage.
Reassembly prep:
- Place modules in order using your A, B, C labels.
- Match hardware bags to module letters.
- Reverse your photos to align clips and rails fast.

Source: townestorage.com
Safety and Ergonomics You Should Not Skip
Safety is part of how to disassemble a sectional sofa without damage. Protect your body so you can finish strong and set up again with ease.
Safe lifting basics:
- Bend your knees, keep your back straight, and lift with your legs.
- Keep loads close to your body.
- Communicate. Count to three before any big lift.
Helpful aids:
- Work gloves add grip and protect knuckles from staples.
- A shoulder dolly or forearm straps can lower strain on stairs.
- Use sliders on hardwood to avoid scratches and sudden drops.
If you feel a twist or hear wood creak, stop. Lower the piece and reset your grip. A pause beats a crack in the frame.

Source: bedbathandbeyond.com
Frequently Asked Questions of How to Disassemble a Sectional Sofa Without Damage
How long does it take to disassemble a sectional?
Most sectionals take 30 to 60 minutes with two people. Complex recliners or sleepers can add another 30 minutes.
Do I need special tools for common brands?
No, most need a screwdriver, Allen keys, and a socket set. Recliners may need a small flat tool to release locking tabs.
Can I do it alone?
You can remove cushions and hardware alone, but lifting modules is safer with help. Two people reduce strain and prevent damage to clips and floors.
How do I find hidden connectors?
Check under the dust cover and along the back base for rails or clips. A flashlight and phone camera help you see into tight spots.
What is the best way to label parts?
Use painter’s tape with big letters for each module and a bag for hardware. Add quick photos so reassembly is fast and accurate.
How should I protect leather during storage?
Use breathable moving pads and avoid plastic touching the leather for long periods. Keep it in a cool, dry place with airflow.
Will disassembly void my warranty?
Most brands allow basic disassembly for moving. Check your manual, since power units and sleeper frames may have special rules.
Conclusion
You now know how to disassemble a sectional sofa without damage, from tools and planning to wrapping and safe lifts. The core ideas are simple: document, label, unlock, lift straight, and protect every surface. With this system, you can move through doors, up stairs, and into storage with confidence.
Try the checklist on your sofa today. Take photos, make labels, and practice unlocking a single joint. If this guide helped, share it with a friend, subscribe for more practical home guides, or leave a comment with your sofa’s brand and a question you want solved next.